Thursday, December 31, 2009

Building a Multi Purpose Test Track


Being Thursday and the second last day of my days off work (where did the time go) I thought I'd better do something constructive otherwise I'd regret it once I got back to work next week.

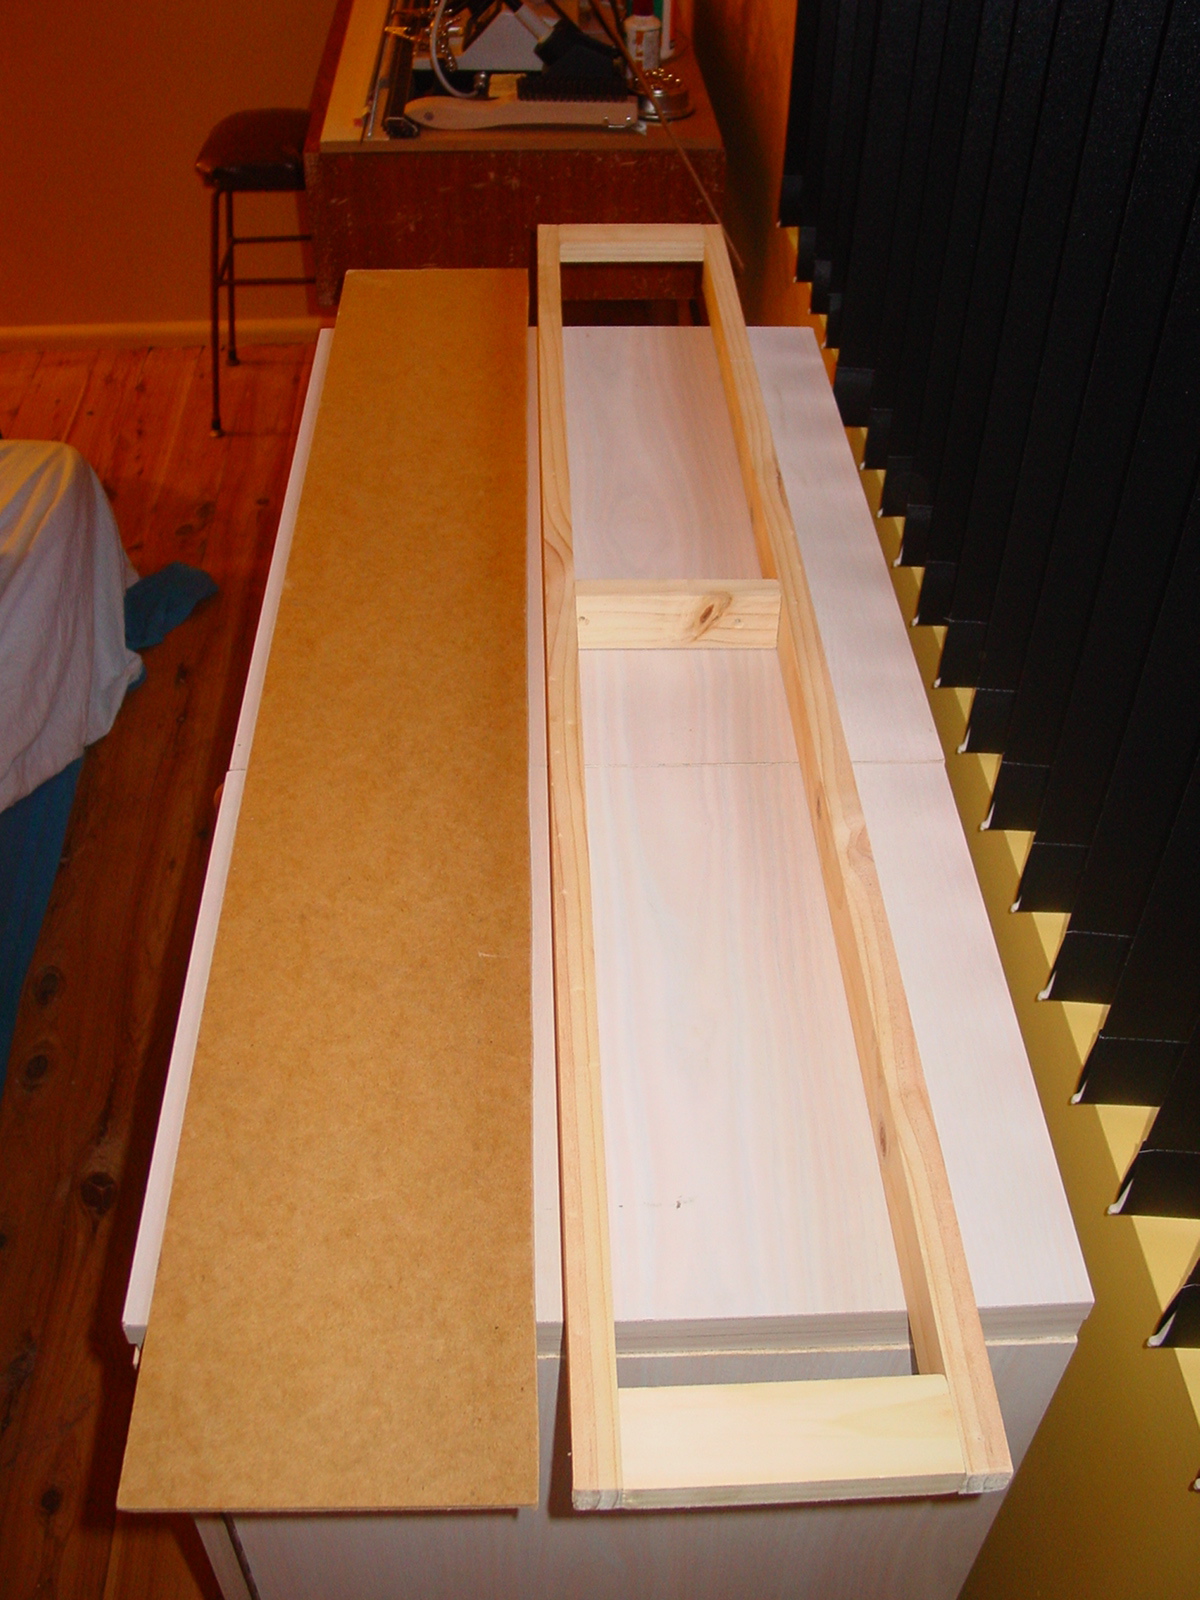
I've been wanting to have a little test bench with some track and points for a while, and figured this is as good a project as any to do over the last few days of the holidays. It's a simple job, a piece of 1,200mm long laminated board, a pair of points, two parallel tracks and a few bits of wire. Sounds simple enough and should only take a couple of hours I figured.

Well, probably six or seven hours later and it's still not finished, but is at least working in a sense of the word. 3803 runs happily back and forth through the points and along both tracks, crossing over from one to the other without stalling, derailing or shorting out, which means that a. the track work of the points is to a reasonable standard, b. I got all of the isolating cuts in the pcb sleepers in the right spot, and c. I managed to wire up the point switches and feeder wires the correct way.

Except that is, for one set of feeders which I wired to the rails the wrong way around (they looked right when the track was upside down!), although this unintentionally tested out the globe used to show if there were any shorts, as it shone brightly upon switching the track power on. I've read much debate about using globes as a short circuit detection and protection device, but in this case it worked fine and within a split second I knew I had a problem.

Mounted to one end of the board is the Power Cab panel, and wired between it and the main bus wires is a switch to allow for quickly cutting power to the track if need be. The wire was all stuff I had laying about. The bus wires are probably thinner than what you'd use on a layout, the feeder wires to the track are probably too big, and the wires from the bus to the point switches is very fine and possible too small for the job, although having said that it all works ok!

Still to be added are some brackets to hold the point switches firmly in place, Kadee coupler height gauges added to the end of each bit of track, one pair with the good old No.5 couplers and one par with the finer No.78 couplers. I also want to add some under track magnets to test that the couplers are uncoupling as they should, and having this little test track will also enable me to experiment with some other ideas I have as well. One of the long ends of track may also be raised sightly at the end to test that rolling stock does roll freely enough on a given grade.

The length is just long enough for a Garratt to clear the point blades on the short side of the points, and
a 38 and a four wheel RU hopper also fit meaning that some simple shunting, coupling and uncoupling between a loco and a piece of rolling stock can be done. Having the two tracks parallel will also allow speed matching at low speeds to be done relatively easily.

Overall it's been a good little exercise though. I've learnt that a couple of ideas I had don't work as well in practice as they do in theory, and it has pointed out some ways in which I can do things a bit quicker the next time around. It's also shown that have managed to make a huge mess of the bench in a very short time, and this is something I need to work on improving as well!

Tuesday, December 29, 2009

The Modeling Nook and Reminiscing


With Christmas out of the way, and a couple of weeks rest for the injured toe, I've got back into sorting out the modeling nook, previously known as the spare room wardrobe. It's a little odd in its design, due mainly to my use of existing items laying about, but it works.

There's a set of three drawers on the bottom, of decent size and perfect for keeping all those accumulated modeling projects. The "priority drawer" has a Lloyds 421 Class diesel and three Hanovale GHG Brake Vans in it. These are things that I must get to sooner rather than later!

Another drawer is full of paints and painting oriented items, and it's good to have them all accessible and in the one spot. The other drawer if full of older and odd rolling stock that doesn't have a box so is best kept in a drawer to keep them safe and free of dust.

On top of the three drawers, is an old desk with two drawers side by side and the legs removed. It's the old type where the legs just screw on so no harm was done removing them. This given the final desk top the correct height and a couple more drawers to put things in.

On top of that is the old trestle table
that I cut down so it is a neat fit inside the modeling nook. This is important so that no items can roll off the sides or back and disappear never to be seen again. Hinged off the front of this is another piece of the old trestle table top (the item responsible for the smashed toe! ) which gives me an extra area to work on, and when not is use it simply folds down to allow the nook doors to be closed.

On the desk are three multi compartment storage thingies contain various nuts and bolts, couplers, track gauges, switches, rail joiners, thumb tacks, reed switches, micro switches, motors and all manner of items that I think will come in handy for modeling jobs.

On top of these is another length of timber, where the "fast moving projects" will sit. Hopefully having the things I am part way through doing out in the open will make sure they don't get forgotten, and when I can't fit any more on that shelf it's time to finish something before starting something else.

There's still a lot more to do, lots more shelves to put in, and apart from the desk top and what's below it everything else may change over time as ideas come to mind. But for now, it's great to have somewhere permanent to work on things, and I even manages to get some more work on some points done that will be used on a simple test track that will have Kadee height gauges, uncoupling magnets and a slight graded section, all for testing rolling stock in one way or another upon.

Amongst moving things around I opened a box containing some rolling stock I built when I was in my mid teens in the mid 80's. An AR Kits GLX louvre van in blue, BDX open wagon in dark grey/black, MLE flat wagon in dark grey with sort of timber coloured decking timbers, and two Trax MRC refrigerated wagons.

It was abit like opening a time capsule looking at these models again. None are masterpieces by any stretch, but each had something that shows that even as a young'n, I had a bit of an eye for detail of sorts and tried to make things look as good as possible with what skills and materials I had at the time.

The MLE has the deck painted in timber colours rather than just grey, and even though I don't remember doing it, it's something that I wanted to do to the Austrains FME's I bought recently to replicate the prototype better. Obviously even back then I had the same idea!

One of the MRC's has had masking tape added to the roof to simulate the malthoid sometimes used on the real thing. I remember building these two MRC's at school during the last couple of weeks when we had activities rather than schooling. One of the teachers had a modeling class for the two weeks which was a good time to use to build these two.

The problem I have with these five models is that with a little work they could be made into quite respectable models, but then as they are they are kind of like a reminder of my early days in the hobby and a yardstick of my skill levels back then. In some ways I think they should be left as is and not improved upon, as they do bring back some fond memories from that time of my life.

Hopefully over the next few days I'll get some more stuff done before going back to work on the 4th of January 2010.

On that note, I'd like to wish you all a very Happy New Year, and I hope that 2010 is a safe and prosperous year for everyone.

Thursday, December 24, 2009

MERRY CHRISTMAS


I'd like to wish you all a very Merry Christmas, and I hope that Santa has had the elves working on plenty of model train stuff for everyone who's been good.

And hey, even those who've been bad will still get some coal, which is handy if you happen model steam!


Monday, December 14, 2009

Safety First People!

If only I had heeded this advice!

Sunday was a lovely day for working both in and out doors. So I thought I'd get to work and make the bench top for inside the wardrobe, which will be referred to as the modeling nook from here on in.

I had a large trestle table top in the garage made from some seriously thick ply of some description, which I thought would be an excellent piece to make my desk top out of.

So after measuring the space it was to fit, I set the table top up on three saw horses, carefully marked where it needed to be cut for length, set up the guide for the circular saw, made sure the bit being cut off was supported by the third saw horse, checked the floor to make sure there was nothing to trip over, made sure the power cord was behind me, checked my surroundings for anything that might be a problem, and begun to cut through the table.

Now as I was setting this all up, I thought to myself that I really should put some shoes on. I'm one of those that loves to walk around the house barefoot and typically only wears shoes when venturing out in public to the shops and what not. But seeing as how the garage floor is always swept clean and there is nothing to injure my feet on typically the garage is a shoe free zone.

So anyway, as the circular saw cut through the last milimetre of the table, the end removed proved not to be as balanced as I had predicted, and preceded to drop quickly and surely to the ground, rotating so that its edge was at approx 90 degrees to the ground just before it reached it. Unfortunately my big toe on my left foot was in the path of this piece, which is about 1,000mm x 400mm give or take, and quite weighty.

It landed sqaure across the nail, which immediately began to bleed rather profusely, and my initial thought was that I had broken it. I managed to hobble back up to the house and yelled for some help. My wife came to the rescue with a towel and some ice, and after a few minutes of sitting quietly I came to the conclusion that it's probably not broken, but by the same token is not in real good shape. I like putting pictures on my blog but I'm sure nobody wants to see a pictorial version of these events!

So for the rest fo the day I sat on the lounge, foot elevated, cursing myself for not listening to that little voice inside my head, which obviously knew that things were going to go bad. Needless to say I didn't get any more work done.

So if nothing else, let my pain be your gain, and please, take care when doing any jobs around the house. Take that extra few minutes to make sure you have your shoes, your safety glasses, gloves or whatever else you need to ensure you get done what you want or need to without putting yourself in danger and injuring yourself.

Saturday, December 12, 2009

Getting Into The Closet!


Things are still progressing steadily on the spare room layout. I've got the week after Christmas off so I'm trying to get a lot of the tedious stuff out of the way, and hopefully the weeks holidays can see some real progress made. The aim is to at least have some track laid by the end of the week off and have run a train, however this may be a little optimistic.

As previously mentioned the corner units were made and mounted, and the centre module has been built and mounted as well. I used some small pieces of aluminium angle to join the modules together as they each step up (or down) from one another, and this proved to be an easy, simple, light and effective way to do it. Down the track I may have a better idea but this works for now.

The fascia boards of the corner units will curve around with approximately a 650mm radius, and with the track being around 70-80mm away from the edge, I should end up with a minimum track radius of about 740mm (about 29") on the layout which is fairly good considering the overall size restrictions. Fascia boards top and bottom are going to be painted black, and all going well, the following link shows the effect I am aiming for, although I do not with to insinuate that my modeling skills are equal to this ........ http://www.flickr.com/photos/nevardmedia/4014228534/sizes/o/

As well as getting some more module work done, I decided that if I was going to turn the wardrobe into a built in modeling nook, I really should give it a nice fresh coat of white paint before I start putting a desk, shelving, layout modules etc in there. After taking a shortcut and not masking the cornices when I painted the room I got a little yellow paint on them, so I figured why not just do the wardrobe in ceiling white, and what's left over I can touch up the cornices with. I'm nothing if not budget conscious and if I can make something dual purpose then all the better.

With a fresh couple of coats of white on the walls and ceiling it's certainly a lot neater, and much brighter in there as well which is handy. I had contemplated not bothering doing it but I'm glad I did and now think I would have seriously regretted not doing it. Definitely another case of taking a bit longer, spending a little more, and doing it right the first time.

The only thing that's had me a little bit puzzled was how was I going to run the top and bottom deck of the layout into the wardrobe, with the small problem of there being a door in the way? I considered cutting two tunnel sized openings in the door, but then realised that to open the door up, they'd need to be quite wide as once the angle of the door increased the track wouldn't fit through it, so that idea was out. The other option was to simply remove the door, but then you'd be able to see everything on the modeling desk, which knowing me will quite often be in a mess! Being that the room is still the spare/guest room, a degree of neatness needs to be adhered to.

So after contemplating the problem for a few day I hit on a solution. What if I unhinged the left hand door that was the problem, and instead of it being hinged to the frame around the wardrobe, hinge it off the other door, creating a single folding door that once open takes up almost no more room than the single right hand door takes up anyway. The doors are hollow so are not particularly heavy, so a decent length piano hinge should do the job.

So off to the local hardware store I went, and upon finding the hinge section, was slightly put off by the price of piano hinges. $49.00 for a 914mm piano hinge wasn't absurdly expensive, however I didn't think one would be enough to hold a full door. 600mm ones were about $29.00 but once again I'd need two so would still be up for about $60.00. There were some 1,800mm ones there which were perfect, but I was scared to look at the price.

After finding the hook they should have been hanging on instead of just laying against the wall, I was slightly confused to see it was priced at $19.50. Less than the 600mm ones and less than half the price of the 914mm ones. So I walked up to the counter and asked the guy if he could just check the price first, and after scanning it it came up $19.50. He couldn't explain why these ones were so cheap compared to the shorter ones, but kindly offered to charge me a lot more for the one I had if it made me feel better about it all!

Once home, the left door was removed, the piano hinge mounted to the right hand door with half a dozed screws initially, and the other door was lined up and also attached with about half a dozen screws to make sure it all lined up and opened and closed like it should. Once that all seemed ok, it was on with drilling the rest of the 72 1mm pilot holes needed in total for all of the screws! Thank goodness for cordless drills is all I can say!

So I now have a pair of doors that still look exactly the same, take up barely anymore room than one door when open, and it will be a lot easier to get trains into the wardrobe now. All I will need is a couple of 100 - 150mm lift out sections that can be removed to close the doors, and replaced when the doors are open if I want to run trains into the wardrobe branch, which is not necessary anyway. I will rig up some form of micro switch that kills track power around the bridge sections so that no trains take the sharp 90 degree turn towards the floor if the lift out sections are not in place.

All going to plan I'll get some more module work done this weekend and progress will continue at a steady rate.

Sunday, December 6, 2009

Getting Cornered


Steady rather than startling best describes progress on the spare room layout at the moment. The thing that had me a little puzzled for a while was exactly how I was going to attack the corner modules. Not that there is anything tricky about them, but sometimes you just can't quite figure out the best way to go about it.

So, instead of mucking about with bits of wood, trying to place them in situ, arranging and rearranging to no real avail, I went back to the old grid paper, pencil and ruler and within a couple of minutes it was all clear.

So armed with a drawing and some timber, I went down to the garage and knocked up the first corner module. The funny thing is, I was very careful to make sure everything was square and straight, as it should be, but was a little disappointed to find that it didn't fit squarely and evenly against the wall? I rechecked it and it all appeared ok, but then I thought I'd check the wall. Lets just say that the walls are not quite as square or as straight as I thought they would be! In any case we are only talking about a few millimeters and in the end it won't make any real difference.

So armed with one module it was easy enough to simply copy it to make the second one, and after a bit of fiddling with heights they are now basically mounted in each corner. All I know have to do is figure out how to make the second level of the right hand corner which still has me a little stumped. Maybe I need to get the pencil and paper out again!

For those interested in the details, the timber is around 40x19mm pine, the corner module is 850mm in each direction, the width where the base will go is 200mm, and the diagonal brace will allow a smooth transition of the front fascia which will curve around on about a 700mm radius, with the centre of the diagonal brace supporting that curving fascia and baseboard.

I've also put together the module that runs between the two corners, and now just have to decide the method of joining them together so it's strong, will always join in perfect alignment, is simple and reliable. The challenge being that none of the corner modules are at the same height as the wall modules due to the track climbing across the back wall in both directions.

Saturday, November 28, 2009

Deck the Walls!


Sorry about the corny title for this post, but hey Christmas is nearly here and I couldn't help myself.

Sydney had another stinker today, it was about 37 degrees here on the Central Coast, so motivation was a little lacking for doing too much physical work. However, I have installed the first four wall brackets, and sat two 2400mm lengths of timber on each level to get an idea of how it's going to look.

I really agonised over the deck heights before screwing the brackets to the walls. At the moment the height of the two decks are sitting at 1390mm and 1580mm from the floor. This is slightly higher than I initially decided on, and I can lower them around 20-25mm without any moving of the brackets if this proves to be just a little too high.

The top deck is possibly marginally higher than I would have liked, although I'm still looking down across the rails so it's definitely not too high, but this allows me to have the bottom deck not too low, and the deck on the opposite side of the room should come in at around 1475mm which is pretty much ideal.

I quickly printed off a cloudy background image to show the look I will be going for. I'm not really into the typical blue skies look often used, and want to try to capture a slightly more dramatic looking scene. Getting the perspective of the background correct in relation to the deck height and viewing angles will be the challenge but if it all comes together hopefully I can add some depth and atmosphere to what is a fairly shallow scene.

Hopefully tomorrows temperature will be a little lower and I can get some more wall brackets mounted and maybe make a start on the actual modules.

Friday, November 27, 2009

Setting The Deck Heights


I knocked up a very rough mockup yesterday afternoon which will allow me to check some clearances, decide if the deck to deck heights will look and work ok, and make a final decision on what height to mount the decks at. It's one thing to mark a pencil line on the wall, but having a three dimensional mockup that I can place actual models on definitely gives a slightly different perspective.

I had initially decided on the top deck surface being about 155cm from the floor, as I wanted the majority of the layout to be not too far below eye level as this tends to gives a more realistic view of the actual trains. There will be around a 10.5cm drop from the top layer, around the room to the opposite side of the room, and then around an 8.5cm drop as it comes back around to the lower deck again. This will mean a top to bottom rail level height of around 19.0cm from the top to bottom deck, and should put the opposite side of the room deck at around 144.5cm from the floor.

However after placing the mockup against the wall, I am wondering if the 155cm heigh of the top deck may be just a little bit too high? It certainly puts the trains at eye level, and will mean the lower and opposite decks will be at a good height, however I am wondering if the dead side on view will cause any problems with clearly seeing trains on the track closest to the wall when shunting, or even being able to clearly see that the points are set correctly.

I've taken a couple of pics that show the crude mockup, taken from an angle that would allow slightly better viewing of the top level, with the trains sitting on what would be the bottom level. This would place the top deck at around 148-150cm from the floor, slightly lower than my theoretical optimum height.

My tendency at the moment is to proceed with the slightly higher level for now, and if it proves to be a little impractical, I can either make some small steps to stand on if vision is temporarily blocked, or, I can adjust the height after it's all mounted by remounting the wall brackets. The second option is not really the way I'd prefer to go though as drilling more holes in my freshly painted walls in not too appealing!

Alternatively I could try to design a way to allow me to mount the wall brackets set to the lower height, and if I find it's too low I could add spacers to lift the decks. Once again possible, but not the way I'd like to go.

In any case, hopefully this weekend will see at least some of the modules made and mounted to the wall to make sure the levels all work out like they have on paper and that I can actually fit what I have theorised will fit.

Wednesday, November 25, 2009

Happy Days


After almost a year of looking forward to getting stuck into the garage and starting "Gunnedah", and then gradually realising that I'm not much closer to actually starting it than the day we moved into the house, it has been a really good shot in the arm to be not only thinking about building a small and simple shelf layout in the spare room, but actually starting work on it.

I'm not one who makes decisions quickly, usually pondering over things for ages before deciding on something, but early last week after work, my wife brought out some colour sample swatches we'd collected, and said "if you're going to start putting things on the wall for your trains, we need to paint the room first so it all looks nice, here's some sample colours, choose one".

There were over a hundred sample colours, but by the time you take out the cream, bone, white, off-white, ivory or beige (with appologies to the Twelfth Man) you're left with quite a few less colours. So I narrowed it down to a couple eventually, and then settled on a nice bright but not over the top Yellow Ochre colour, which turned out to be called "Happy Days". What an appropriate colour for a layout containing a model railway layout I thought.

So paint was bought on the Wednesday, and last Saturday saw me up and about before 7am, and emptying the room of still unpacked boxes, the queen sized bed and general items that have accumulated there (back down into the garage, so still going backwards there!) and it was time to get painting.

I'm not the worlds best painter, nor is it a job I particularly enjoy doing, but with such a purpose intended for the room, it was a rather pleasurable way to spend a Saturday, coupled with a couple of hours of motor racing on the t.v. thrown in while the first coat dried.

To say that it has made a huge improvement over the rather drab thirty odd year old off white colour it was is an understatement. Light is now reflected around the room instead of absorbed, and it's a much cheerier space to be in.

I've also knocked up a bit of a trial module out of roughly 40x20mm pine, with some thinnish 2-3mm board I had laying about for the surface. By the looks of it the pine in that size is more than strong enout to support the samll amount of weight that will be placed on it, and being only about 170mm wide, does not need much strength for the surface as there is only around 130mm of space between the framework anyway. Once the trackwork and point activation mechanisms are in place more bracing can be added if need be.

This width means that the layout will take up no more room than a normal shelf, but still allow for three tracks side by side with room on either edge, using 40mm track centres. Using the narrower than normal 50mm track centres also means a set of points joined together takes up a bit less room which is handy for small areas.

The cutouts in each end are so that the frame sits down over the wall brackets a bit, just to hide them as much as possible. I've even toyed with the idea of mounting the brackets upside down so that the vertical part ends up behind the layout back scene, and not projecting down below. Also the cutouts can be moved inwards and do not need to be at the ends. Having them somewhat inboard will ("should") actuall promote less sagging in the middle due to there being som additional forces in the opposite direction either side of the bracket. At least that is how I think it works, not being an engineer!

The longest span will be across the window, which is 176cm wide, so there may be some lateral thinking required here if a span of this length proves to be a little bit too long and some sagging occurs. I'm planning on having a back board going from the bottom to the top of both levels on this part anyway, and with this screwed into the frames, it should stop any sagging I would think (once again using my vast engineering knowledge!).

I've gone through the N.S.W. track diagrams which seem to show almost every location in the state going back to the early 1900's, and have selected a group which represent the type of track layouts I am looking at recreating. Small twin and triple line locations with your typical cattle ramp, goods siding with platform or small shed, wheat silo road, loading ramp, coal stage, ash pit etc. These features will hopefully allow for some really interesting opperation with lots of shunting around of brake vans, placing wagons in sidings, reassembling trains for different destinations etc.

Point activation is being thought about, and will no doubt be a manual system with either push/pull rods under the surface activating the points, or possibly even using the Pufsuk system which uses air pressure to activate the points. http://pufsukpointmotors.bounce.com.au

In any case, it's nice to be making progress on actually having somewhere to run some trains, and possibly even invite some people over to have a run as well. Happy Days ...........

Sunday, November 15, 2009

From Test Track to Spare Room Layout!


I'm sure that I am not the only person who is afflicted with the characteristic of starting off with a simple idea and quickly complicating it! After taking delivery of my Eureka 38, I soon tired of running it backwards and forwards along a length and a bit of flex track on my desk. And whilst I have a 7.2 x 7.2 metre garage down the yard, unpacking all of the unnecessary items since moving in around 6 months ago has been slow, and in the mean time I seem to have created an even bigger mess in there.

As well as having to clean up and make space, I have come to the realisation that no matter how much I hoped I wouldn't need to, the garage will need to be lined and eves installed to stop the atmosphere from entering the shed. Considering the roller doors are open maybe half a day a week, the amount of dirt and general air born objects that find there way inside is quite remarkable, and depressing. I can't imagine trying to keep a layout free of this muck, so realistically between unpacking the remaining boxes, fitting eves and lining the shed to some degree, it will unfortunately still be a while before Gunnedah begins.

However, the spare room has gradually returned to normal after being a half way room for stuff that needed to be in the house to be unpacked, but was yet to have somewhere to put it. Basically a queen sized bed, a sewing cabinet, my guitars and amplifiers (another hobby of mine) and some odds and sods is all that is now left in there. I have almost emptied the built in wardrobe which will will house my model making work bench
which I am about to begin making, which will finally give me a permanent space with which to work on all the projects I have been gathering.

The built in wardrobe is about 55cm deep and around 140cm wide inside, and I had planned a simple test track on a level, with a couple of sets of points to simply test rolling stock on and make sure that all was well running wise. However it then occurred to me, that with the wall running adjacent to the wardrobe being an additional 3.3 metres long, I may be better running a length of track along that wall on a shelf. After all 3.3 metres is better than 1.4 metres at best, and while I'm at it I could ballast it, add some ground cover, a backdrop and a roof with some simple lighting to create a diorama effect.

So already I'd gone from a simple 140cm piece of track to a 330cm diorama in the space of a few hours. It the occured that if I was to cut a small hole in the door I could continue along the wall and curve into the wardrobe with the extra bit of length. That would give around 5 metres of running room which is not too bad for a test track.

But then I had a thought, why use just one wall? Overall the room is about 4.0 x 3.3 metres, and if I used the remaining 3.3 metres of the wall with the wardrobe at one end, then the 3.3 metres across the back wall and then the 4 metres back along the other wall, I'd have a bit over 10 metres of running track excluding what's in the wardrobe. Certainly not the biggest run, but with a few sets of points at each end to make a couple of roads, I could actually operate it in a point to point fashion with some shunting around at each end.

So now I'm looking at an around the wall shelf style point to point diorama, with the layout being only about 15cm deep along the longer walls and maybe 20cm deep across the back wall which would be above the head of the bed. I can easily use around 750mm radius curves as they do not protrude that much into the room space, and being at the end of each side of the bed, it's an area not really used anyway.

So I began drawing some planes of how the track would look, with a single line joining two small country style locations with things like a loading bank, goods shed, cattle ramp etc. With a few sets of points and two or maybe even three tracks squeezed in it would actually allow for some quite complicated shunting manoeuvres taking place to get each wagon in its siding and then getting the train reassembled with the brake van at the end and heading back.

So there we go, from a simple test track to an around the room layout in the space of an hour or so. But wait, there's more!

With the available run between terminals, if I ran up a grade from the wardrobe side to the opposite side, and then had another branch running back towards the other side, but also running up a grade, I could have the short side of the room double decked, giving two separate scenes one above the other, and in effect now giving me three terminals. So the train would be assembled at terminal A, continue around to terminal B where some wagons would be spotted into sidings, the brake van swapped to the other end of the remaining wagons, and then the train would continue on to terminal C sitting directly above terminal A. Using this style I could replicate some of those small country style locations where a branch line runs off in another direction. So although the actual layout depth is narrow, the potential operational interest would be huge.

I've added a simple track plan to show the type of thing I'm looking into, with the left hand side showing the upper and lower level next to each other (top on the far left) and the top left representing the wardrobe branch. I'm actually going through some of the NSW country locations where simple two track plans were in existence with things like a livestock ramp, goods shed, loading bank, small platform etc, so that I can model something that actually existed.

I've already gone to buy some wall brackets and have begun setting the levels around the room, and hopefully over the next few weeks I'll be able to get going on it.

So once again, I've managed to turn a simple idea into another rather large project.

Tuesday, November 3, 2009

We Never Knew What Friends We Had


To paraphrase a Billy Joel song (Leningrad), "we never knew what friends we had" is a very appropriate phrase for me at the moment.

Apart from some technology failure of late (my computer had a hard drive failure) it's usually my failure to keep up with things. I have a g-mail e-mail account which I think I needed to start this blog, but of course did I bother to check it occasionally? Well why would I, I didn't give it to anyone, so you could imagine my surprise when in checking it the other day there were quite a few e-mails in the inbox.

Obviously a few people read my blog, because in my inbox was an e-mail with a plan for the aforementioned E Wagon needed to build the bogie milk tanker BMT 1, and an offer to lend me some 35mm negatives from pictures taken at Hawkesbury River Station and surrounds in 1966.

Now the E Wagon plan was brilliant, and greatly appreciated, but the offer of a complete stranger to send me their forty three year old negatives for me to look at and get prints made up of if I wanted was quite humbling. These are things that cannot be replaced, and whilst not having great monetary value, are priceless in my eyes.

After getting sixty odd photos developed I was completely gobsmacked at the information I now had that would not likely have been available anywhere else. The station, refuge roads, water tank, level crossing, various sheds, sidings, and the coal stage that no longer exist to name but a few, in detail from many angles, some of which would have you prosecuted these days, all in beautiful black and white with crisp details, and showing things that no simple diagrams or plans could reveal. The picture of the warning sign on the coal stage is a classic example, and something I hope to duplicate when I build a model of it.

The thing is, that these things I asked for have come from people I've not yet met, and may not ever meet, who don't know me from a bar of soap, and yet through this wonderful hobby we share have felt compelled to share the information they have for no other reason than to help me try to realise my dream of recreating these things in miniature.

So while I have highlighted only two recent cases above, to anyone who has sent me anything, shared information, imparted wisdom or simply shared their opinions, thank you, friends.

Something Finally Arrives!!!


In this age of often pre-ordering the trains we want to buy rather than simply buying them once they appear in the shops, we sometimes find ourselves enduring quite a wait for these models. This is not to say that the people organising for these models to be built are to blame, as there seem to be some rather difficult challenges at the factories to deal with, where production slots are hard to get, any corrections add months to the production schedule and component supplies are not always available.

Of course there is usually a financial plus in pre-ordering, with a decent discount usually offered, you're certain to get the model you want before it sells out, and in some cases it helps to budget by having most of your money tied up in items you really want as opposed to randomly buying things as they appear only to find something else come out immediately after that you'd rather have bought but now can't afford!

It also has the effect of one sometimes thinking "gee I haven't bought a train for a while", when in fact the reality is more like "I haven't had a train delivered for a while". As of last Sunday, the "
I haven't had a train delivered for a while" list included 1 x 38 class, 1 x 48 Class, 1 x 422 Class, 1 x 81 Class and 2 x 40 Class locomotives.

However that "
I haven't had a train delivered for a while" feeling has been temporarily pushed aside with the delivery of a black Eureka Streamlined 38 class numbered 3803. My dear wife bought this for me as a surprise birthday present, two birthdays ago! Of course the 38 has had a few more delays than what is probably normal, but none the less it is finally here.

So armed with a metre and a half of track and a Powercab it was removed from the box and placed on the track. After the obligatory photo session (where I take about a hundred photos and find about ten are pretty good!) it was time for some shunting back and forth.

The default sound volume is like being strapped to the side of the real thing, so probably a bit too loud for my taste where I prefer to just hear them when they are in front of me. That's my personal preference of course, but I was glad when I figured out how to turn it down, with some help from my Aus_Model_Rail mates, thanks guys.

Running qualities are very good, with it smoothly starting at a crawl and accelerating gently away, and then slowing again to a crawl before stopping. I didn't test its haulage capacity because, well, how much rolling stock can you fit on a metre of track!

In any case, it was nice to have a new toy, and it has definitely ramped up my enthusiasm to get something done so I have a bit more room to run trains, or at the very least a decent module with some scenery to photograph some models on.

Sunday, October 4, 2009

Brake Van Modifications Begin


With the era I'm modelling, brake vans were a must at the tail end of any goods train, so I will need quite few on the roster.

Now Trainorama have (or had) some beautiful brake vans that suit my era perfectly, however I was too late getting back into things to buy them before they sold out, grey OHG's in particular.

However as luck would have it, they have some MHG and PHG brake vans coming in 2010 which will fit the bill nicely. Highly detailed, very well painted, and basically need just a little weathering and they are right to go. As much as that's easy, it doesn't really give you that sense of satisfaction you get from doing something yourself.

About twenty odd years ago, Trax (now Powerline) brought out a model of the NSWGR MHG brake van. In its day, being made to suit the toy market and modeller alike, it was not a bad model at all. Drop the height, add some decent bogies, Kadee's and a bit of weathering and if you were keen some metal handrails and it made up into not a bad model at all.

They pop up on E-bay occasionally, and if you are lucky you can score one for around $15.00-$20.00, although I have also seen people get keen and bid up to $50.00+ for a standard one and $60.00+++ for a modified one. To me $15-$20 is top dollar for one, and I was lucky enough to pick up three in this price range over the past few months.

Today, armed with a little enthusiasm after visiting the AMRA Liverpool exhibition yesterday I thought I might make a start on doing the necessary modifications to bring them up to (or as close as I can manage) today's RTR standards.

The main body of the MHG is pretty good, however the door and louvred panel on one side is transposed. So armed with a very sharp and fine scalpel blade set I bought at Bunnings after seeing Ray Pilgrim advocate the use of them ( http://bylong.blogspot.com/2008/11/i-found-new-tool.html ), ironically for exactly the same job!

Cutting out the door and louvred panel took only a few minutes, with the very fine blade removing literally only the space between door, louvred panel and body without any of the actual panel or door material which is very handy.

I have also removed the sliding door section, as a feature of these vans was sometimes running with the doors open. Of course this will mean adding some degree of interior detail, but that just gives me something else to do to test out my modelling skills.

Apart from removing the doors, and doing a bit of removing some of the moulded glass sections of the one piece moulded insert, I didn't get much more done today. So still to go is refitting the single door and louvred section, installing the sliding door in an open position, and then drilling the body for metal handrails, lowering the bogie bolsters, fitting some underfloor details, Kadee's, and possibly fitting full height better detailed roof vents.

In any case it's just another project to undertake for the simple enjoyment of it, and depending on how well this first one comes up will depend on whether I undertake the same mods on the other two. If my skills mean that my modified MHG falls way short of the coming RTR version, I may just admit defeat, E-bay the other two and happily purchase some RTR ones, although I think as long as my modified ones look ok, I'd get more enjoyment out of watching them running around than something that I simply purchased.

2009 AMRA Liverpool Exhibition


I spent a few hours at the 2009 AMRA Liverpool Model Railway Exhibition on Saturday. Like most exhibitions there is the good the bad and the ugly, however by direct comparison to last years exhibition at Hurstville this was a big improvement.

Better venue, more space in the main hall, nowhere near as hot, better quality and variety of layouts, better trade stands that you could more easily access, and overall I left with the impression of it being a very good exhibition.

One gripe I have, which is in no way the fault of the organisers, is the utter contempt of some people, who feel the need to gather either in front of the layouts or in the isles, and carry on in depth conversations whilt being totally oblivious to anyone around them trying to see the layouts or simply walk past. It's something I've seen at all exhibitions but still never ceases to amaze me.

On the positive side, there were some good specials on hand for those lucky enough to spot them or simply be there before they disappeared. I bought a set of On Track Models GLX Louvre Vans, fearing that they will run out before I get around to buying some, I got a set of 2AE bogies for my BMT 1 Milk Tanker project, five "Railway Album" books by the NSW Transport Museum for $5.00 each which feature some great photographs of early diesel late steam action in NSW which is what I'm modelling, a lazy mans screw pin vice to save twirling the fingers when drilling fine holes in things, but the best and most unexpected score was a brand new Tuscan (or Indian - the debate rages on) Red Trainorama 44 Class numbered 4498 for $150.00 (rrp $245.00).

One of the highlights for me was the superb "Stringybark Creek" O Gauge layout featuring some fine NSWGR steam and diesel rolling stock, and was probably the first large scale layout I have seen in the flesh which actually did justice to the detail you should be able to apply to this scale. If space and money was no issue then this opened my eyes to modelling in this scale.

"A Tractiv Effort", the successor to "Time and Patience" once again stood alone in presenting the most realistic "typically Australian" outer suburban scenes with exquisite houses (with gardens, sheds, and detail to die for), vacant blocks (with grazing chained up goat no less), service station, and even the infamous wheely bins (our garbage bins are big plastic bins on wheels). I would have spent more time looking at this layout than any other, and yet I doubt I could tell you much about the trains that were running through the scenery, so occupied was I with taking in all the little details which could be missed without taking the time to really look.

Kieran Ryan ( http://www.krmodels.com.au/ ) once again had his Silo's, Grain Sheds and detailing parts on display, and the big four bin Silo there was very impressive and a look towards the future when I get around to getting an SO41 and grain shed for Gunnedah yard.

I've added a few photos, out of the 160 odd I took these ones really speak to me, and although I'm a very average point and shoot photographer I think they came out ok.

Monday, September 28, 2009

Where does the time go?


It's been almost two months since my last update, so after being inspired by another Blogger (thanks Bob - http://southcoastrail.blogspot.com ) to get tapping on the keyboard again, I thought I'd bring the blog up to date with the latest goings on.

On the domestic front, I can begin to see some light at the end of the tunnel in as far as the non model railway work slowly dropping off around the house. Once again any actual modelling has been scarce lately but I have been doing a lot of research and collecting ideas for future projects.

The latest bit of rolling stock for the wish list is the 1940's Dairy Farmers BMT 1 twin tank milk transporter (pic at top). There were some articles in AMRM many years ago with some detailed photos and drawings of the various milk tankers in NSW, and this particular one looks very interesting and will be something a little different.

The biggest problem with this particular item is that I cannot locate any coloured photos, nor can I find any drawings of what an "open framed" NSWGR E Wagon looks like. I assume it looks like an E Wagon with the decking removed, but to model it this way I will need to fairy accurately model the open frame. Anyone got an E Wagon frame drawing laying about?

Also there is some conjecture as to the colour scheme of the tanker in it's original livery. I tried contacting Dairy Farmers hoping they may have some archival colour photos but no luck there.

So far I have this information from AMRM .......

"Initially the colour scheme was dark (C38) green tanks with silver cradles and end retainers; the underframe, ladders and bogies were black. The lettering on the tanks was red with a yellow border, the lettering style and wording is shown in the photograph."

But then Bob G from aus_model_rail added this ......

"Back in 1965 I was working with a signwriter that had spent his yuth at Dairy Farmer's Ultimo depot. Sam would have been in his late 50's then and admitted to having dressed up one of the double tanks. To hi it was a job. I worked out that he musy have worked on BMT1 but could only get out of Sam that the tanks were a blueish colour."

In looking for information though, I came across some very interesting photographs from the state archives, of what appears to be the actual glass lined tanks, being delivered by two trucks to the Ultimo Dairy Farmers location, with signs attached saying .....

HYGIENIC GLASS LINED MILK
RAILWAY TRANSPORT TANKS
DAIRY FARMERS CO OP MILK co ltd

The following text went along with the image -

Title - Two of J McFarland's White trucks with new glass-lined milk tanks for rail transportation at Dairy Farmers Co-op Milk Depot.

Date of work 1933-34

Place - Dairy Farmers Co - operative Milk Co Ltd (700 Harris Street, Ultimo, N.S.W.)
Not that it really helps with modelling the tanker, but for me who likes to know as much as I can about things, this was a great find. I cannot see any reason for these not to be the actual glass lined tanks from BMT 1 before it was built?
I've ordered a NSWGR E Wagon kit, so that I can at least get a wagon of the correct size to begin the projet with, albeit with decking in place, and I'll have to grab a set of bogies to suit. I bought some PVC tubing of the almost correct size, so I can also being on some tanks and fiddle around with the various supports for them as well.
So the research on this interesting project continues and hopefully I'll actually be able to make a start on building it one day and adding images to this Blog.
Coming up is the big Liverpool model railway exhibition where I hope to be able to buy a few more items to boost the rolling stock numbers, and like always keep an eye out for those exhibition specials that often appear.

I'm also very much looking forward to taking delivery of a black streamlined 3803 from Eureka Models, which I believe are on the boat somewhere between China and hear and should be here soon. I believe there will be some at the Liverpool exhibition so I'll be able to see first hand what I will be getting, and I cannot wait.
That's about all the news for now so until next time, happy modelling to you all.

PS. My Casula Hobbies E Wagon arrived yesterday, however there is no frame detail whatsoever, so no luck with BMT 1's frame details as of yet.

I've e-mailed Greg Edwards at Datasheets ( http://datashet.actewagl.net.au ) to see if he has any plans that may help.

Sunday, August 2, 2009

Another Pair of Points


The last couple of months have seen a lot of progress made with scenery, woodwork and some electrical work.

Unfortunately the scenery has been shoveling a few tons of blue metal, dirt and mulch from the front yard to the back yard, then into above ground veggie gardens, the woodwork has been making shelving to house my rather large collection of magazines and books, and the electrical work has been some extra power points and lights in various parts of the house.

However amongst the household duties I have managed to almost complete another set of points. This time I thought I'd try making a pair of points as a unit, as this is how they will need to be on the layout.

I figured it may be easier and quicker to make them like this rather than as two separate sets.
I'm not sure if it was that much easier or quicker in hindsight, but it was certainly not any more difficult and I will definitely make any further sets like this.

Like most things, I tried a few different techniques with this set compared to the first set, and the next set will see a coupe of minor tweaks that I hope will make some small increases in ease of construction.

I think the next set I tackle may be a curved set as they look like fun to make, and will no doubt require some small changes in technique to get them just right.