skip to main |
skip to sidebar


 Well, unlike most weekends where they seem to fly by and before I know it it's Sunday night and I have little to show for it, this weekend's been a bit different.
Today started with taking the section of track with only the PCB sleepers attached down to the garage, and hit with a light'ish coat of the good old Kill Rust etch primer. I didn't want too much on there as the code 55 rail is very fine, and it would be easy to glug up with paint.
Basically I wanted just enough etch primer on the rail to give the the paint used to replicate rust to have something to key too, as well as giving the PCB sleepers a base grey colour to work with rather than the copper colour which doesn't look like anything we see in real life.
Once the etch primer was dry it was time to try to replicate the balsa sleeper colour on the PCB sleepers and then give the rails a rusty look. Again I broke out the Tamiya XF-1 Flat Black, XF-52 Flat Earth and used a little of each on the tip of the brush, diluted with some Isocol Rubbing Alcohol. I have a little stainless steel tray which I put some of the alcohol in and then add the paint to it, mixing it around as necessary to get the right consistency and colour. I find it easier to build the colours gradually than do it all in one go, which seems to work for me.
It's hard to get the PCB sleepers to the same colour as the balsa wood ones, but a small variation does not matter as it gives that little bit of random variety. Having a diluted mix of colour also leaves some of the grey etch primer showing through so basically it's a matter of balancing the added colours to get the target shade I'm after.
Now comes the rust effect on the rails. I'm sure there's as many methods for doing this as there are people who do it, and you can buy paints like rust and rail brown which seem to do the job nicely for others. The only thing I sometimes notice is that the rust effect is sometimes too harsh, or too solid, and just looks a bit too heavy. It's hard to pinpoint, but the look I was aiming for is rusty, as well as dusty, that kind of light grey'ish dull finish with a light coating of rust.
I'm probably no different most who have been in a hobby for a long time, and even though I wasn't actively modelling for around twenty years, I still had packed away with my old trains all of my various paints and tools, bits and pieces. Amongst this lot was some Tamiya orange tinter that I used to use to give clear lenses an orange tint to replicate blinkers lenses on model cars. It's code is X-26 and it typically is a thin'ish mix with a slight tacky finish from memory. I say from memory because I would have bought this bottle when I was about eleven or twelve, so we are talking about twenty seven years ago!
Now to digress for a bit, I have used this bottle recently to see how it would go replicating rusty stains on an old Trax MRC I built when I was around fourteen years old, once again a looooong time ago. When I initially opened the bottle of orange tinter, it was no longer a thin consistency, but rather a solid mass that didn't seem to work too well with a brush poked into it. Hmmmmm, it would be a waste to throw it away, so I thought I'd add some of the wonder stuff, a dash of the Isocol alcohol.
So armed with a piece of old rail I began to give it a stir and see if it would thin up a bit. It didn't, instead making a sticky almost rubbery mixture, but amongst the still semi solid mass, was now a dilute mix of orange tint, slughtly this, but quite full of colour no less. I added more alcohol and shook the bottle furiously, but it does not seem to be able to break down the semi solid mass, however, there is plenty of colour than I can still soak up with a brush.
Starting with this odd mixture and then mixed again with a little black and earth colour, I built up a stain and applied it to the MRC with lots of alcohol added to make it a wash. I'm not completely happy with the finish, but it's not too bad in all honesty, and certainly better than the stark white that it used to be as seen here https://blogger.googleusercontent.com/img/b/R29vZ2xl/AVvXsEihGM9lEIRdmDW9H-eqG8t7GjB9jk4l2K-ebkG34b9Rr_sj6dlKmjsYVt1HmTCwTw8QlQqMW4IDfSkeiaGTkdz2xyjJfnuHITbCWEJz60zsAGtkDSHPz_XZWIzD4KdCWAr_IV_-6eVk5rQ/s1600/DSC03982.JPG
In any case, getting back on track (yes a bad pun), I wondered how this orange tinter mix would work as rust on the rail. With the grey etch already in place, I once again dipped the brush in the mixture and then externally thinned it down a little more with more alcohol, and applied it to the rail sides. Being very thin it ran easily along the sides of the rail, so I could load the brush up and just drag it across the base of the rail and it would pretty much run into place. I needed a couple of coats to get the right amount of colour needed, but over all I am very happy with the result.
It has a certain semi metallic finish to it which I like, and has keyed well to the etch primer. With a dilute mixture I also dragged the brush across the sleepers where the rail would sit, as I have noticed that the rust on the rails bleeds into the sleepers on the real thing. Once dry, I then stuck the rail down over the balsa sleepers with some PVA glue placed where the PCB sleepers would sit, and a weight was placed on the rails while they set.
I've taken a few pics both inside and outside, and I have to say that for an initial attempt I am well pleased with the result. It's quite amazing how different things look in natural light as well, but ultimately you really have to aim for what looks right under the lighting your layout will be under.
Using the very basic maths on one yard of track taking me about a weekends worth of work, laying the twenty five to thirty odd yards of track the layout will need (plus points) should keep me busy for a while!


 For quite some time I've been meaning to build a small diorama for photographing pieces of rolling stock and locomotive's on, and thought now would be as good a time as ever to do it.
Even though the main aim at the moment is to get the shelf layout underway, building a small diorama would give me a chance to try out a few ideas and techniques that I want to use and see if they work as good in practice as in theory. So whilst this is a bit of a side track, it gives me a chance to practice some soldering again and get something finished for a change!
So armed with a piece of 900x300mm ply, some cork strips cut from 300x300 cork tiles bought from Bunnings, some masking tape, PVA glue, balsa wood and pcb sleepers and some code 55 rail I got to work.
Instead of cutting the cork to roughly sleeper width, I cut thinner strips only around 8mm wide which are then placed to line up with the outer edge of the sleepers, leaving a gap in between the two strips. The ideas behind this are basically these. It uses less cork so saves money, thinner strips are easier to form into curves, the space in the middle will be used to run the droppers from the rail to the main bus wires, as well leaving room for the piano wire that will go down to the two position switches that also switch frog polarity.
So that all sounds great in theory, but what about the trench left in the middle when it comes to laying the ballast. Well, I also wondered if I used masking tape across the top and then used it to form a gradual taper on the outsides of the cork to help form the ballast shoulder. This in theory will mean I should need less ballast, and be able to have a fairly consistent shape to the shoulder, with some variation purposely used for effect.
I used a small amount of PVA glue to stick the cork to the plywood, and with a piece of weighty laminated wood laid over the top after positioning the cork it was allowed to dry for about an hour.
Whilst this was setting I got to soldering the PCB sleepers to the code 55 rail, using one PCB sleep in every sixth position. On the straight track I think the PCB sleepers may only need to be used for every seventh or eighth sleeper as the rail is not really likely to go out of gauge in such a short distance, especially as it will also be stuck to the balsa sleepers as well.
I soldered one rail in completion to the PCB sleepers before adding the second rail, and am wondering if when laying curved track this may be an interesting technique. If I solder one rail first, then lay it in situ curved on the cork in place like a piece of flex track, I can then add the second rail in position. Once again we'll see how this goes in practice a little later on.
Once the cork had well and truly stuck to the plywood I stuck the masking tape down over the top in two strips, forming a nice gentle shoulder on each side. I have no idea of masking tape degrades over time, but I figure once coated with a PVA mix and ballast, even if it does the ballast should be a hard formation and not collapse anyway!
I've already cut a fair amount of balsa sleepers in a little jig I made which at least makes this job a bit faster and a little less tedious. I'd soldered the PCB sleepers based on using 2' 6" sleeper spacings, so it was simply a matter of laying the track in position and marking where the PCB sleepers fell, and then using a scale rule marking the appropriate positions for the balsa sleepers to go in between. When positioning the balsa sleepers I wasn't too critical to get them exactly square and evenly spaced. Branch line track seemed to be a little less accurate and this slight wobbliness adds to the overall effect anyway. A small smear of PVA glue was run along and the sleepers stuck in place.
Once set in place, the sleepers where given a light cote of Kill Rust etch primer which comes in a pressure pack spray can. Sleepers seem to get a bleached grey colour over time, and this was a quick way to get an overall base colour without having to individually colour each sleeper.
Once dry, I got a bottle of Tamiya Flat Black and Flat Earth, and diluted with some Isocol rubbing alcohol, used a wide'ish brush and gradually built up a little contrasting colour, trying not to add too much. The beauty of the diluted mix is that you can very slowly build up the colour, as it is very easy to add too much using straight paint.
Even taking my time, I think I may have gotten a little too much brown into the sleepers, although up close and in some pics I took they do look quite good. Once I add some ballast and paint the rails I'll have a better idea of how they looking the setting.
The rail is yet to be attached to the sleepers, as I want to paint it and have the PCB sleepers basically textured before I stick it down for good.
It's probably a bit hard to tell from my average quality images, but I think overall I'm much happier with the look than what I have previously been able to achieve using flex track. And whilst the hand laying method is slower, it does give a much better representation of a light branch line which is what I want to model.

 Going back a couple of posts where I lamented about my non acceptance of the size relationships of HO scale trains vs cars and trucks, it was interesting to receive a few comments from people who had a similar impression. If nothing else it was nice to know I was not alone in having this idea.
Anyway, I was going through a folder full of images I have found online and came across one that was very very interesting. Basically it was an old International or Dodge truck, a very very common model in Australia in the 60's and 70's, and being quite familiar with this model and its size, it kind of put a few things in perspective.
Firstly looking at the picture, I get that same impression of the truck being too small relative to the S wagon. If I was doing a version of a police identikit picture, and was asked to increase or decrease the size of the truck until it was in proportion with the S wagon, I would probably make it a bit bigger than it is. Basically my idea of sizes between these two things is disproportionate.
But, having a think about what I had laying about in the spare room, this gave me a chance to have a play as well on a Friday night where there was not a lot on t.v. to keep me remotely interested.
Now the truck I have used is not a Dodge, and is not strictly HO scale, but most probably 1:76 being an old Matchbox model, it is none the less in relative terms "similar" if not slightly bigger than it should be.
Placed with a Road Ragers Holden it looks about right in relation to size, and my brain doesn't have a problem with them co-existing together.
So, armed with an S wagon I have had for about twenty five years(and it looks it), a GLX of similar vintage, a flat bed truck and an old Holden, I've recreated the scene in what you would have to agree is a very fine representation, and an example of my substantial modeling skills!
Interestingly the relationship between the truck and the S wagon is similar to the real thing, and the car looks in proportion to them both and in relation to the GLX from this particular angle. The photo of the actual scene also makes my brain realise that even small four wheel wagons like an S wagon, would swallow a small to medium sized truck like the old Dodge quite easily, which is not what I think possible when looking at a lone S wagon.
I think the key to all of this is that we may not realise just how big even small pieces of rolling stock are, not to mention locomotives. After looking at some pics of the old 35 Class working the rails in days gone by, they are also not a small loco. I think we forget that they share the same sized drivers as a 38 Class, and pictured double heading with Garratt's shows them to be quite a sizable loco in all dimensions bar overall length.


 If there is one thing I am relatively good at, it is planning and scoping out a project. I'm not one to rush into things without giving them careful consideration, and try to make sure I have a reasonable plan and idea of the finished product before I begin. The down side of this, is that I can tend to spend way too much time planning and not actually get started!
The base boards for the spare room shelf layout are a classic example. About twelve months ago I started construction of the module framing that would make up the base for the track to go on top of. I had it all planned out in my mind, but each time I went to go a bit further, I just wasn't totally happy with the method. So for months and months I have been looking at various ways to get around the problem, until I finally realised that the way I thought would work just wasn't the best way to do it.
So this weekend, armed with a few bits of ply and some pieces of the framing timber I already have, I started cutting and screwing bits together, and before I knew it I had two parts basically done, sitting on the wall brackets ready for final adjustments and a method to securely attach them together so they are perfectly lined up.
These modules are on the long wall of the spare room which is about 3.94 metres long, and these two modules make up 3.08 metres of that length. The end module which is 1.28 metres long is an odd shape, basically to make sure I can use every single bit of room I have.
From the initial design of this layout where the base was only about 12cm wide, it's crept out to around 30cm wide, partly because a 30cm deep book case now resides below it on this wall, so I figured why not take up that same area above it?
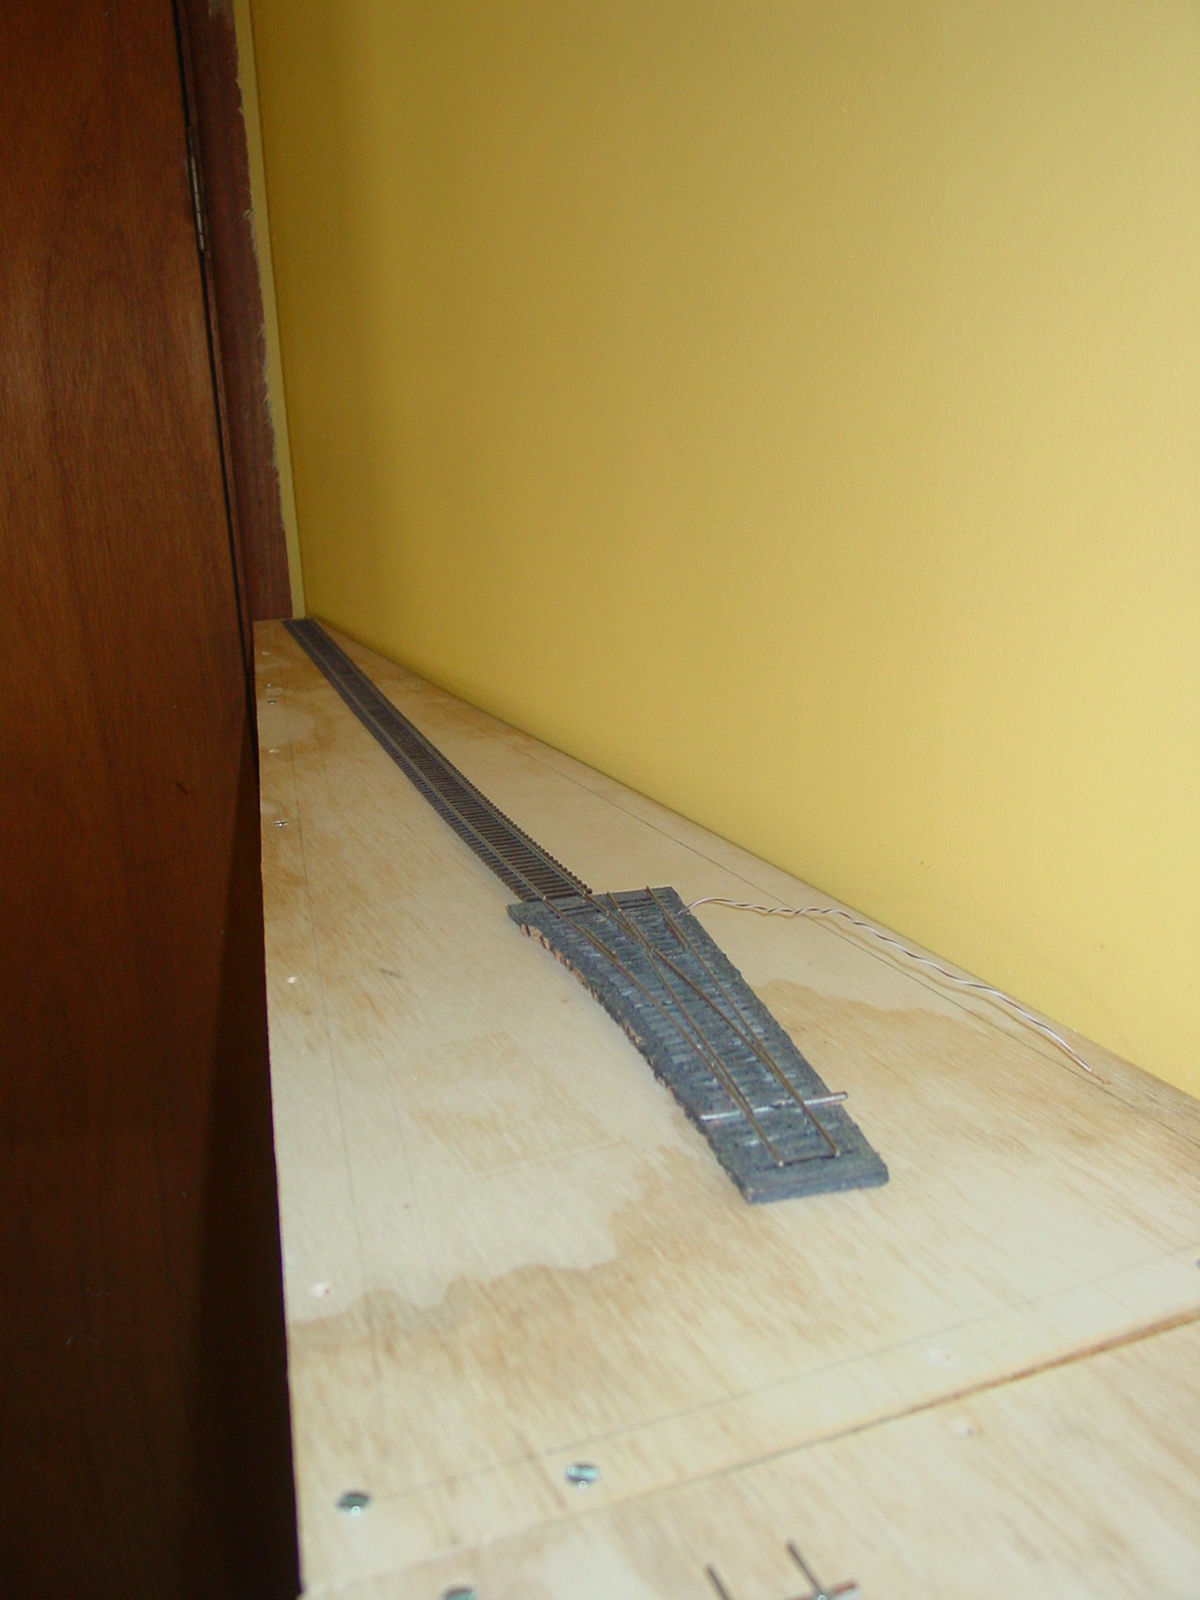
The result being that this end module starts at the 30cm width, but tapers all the way down to 6cm where the layout ends behind the door. This allows the door to open most of the way and basically rests against the layout edge, and gives me that vital extra room on what is by most standards a reasonably small layout.
I'm not exactly sure what will go down this end, but it will basically be the end of the runaround, where brake vans can be shunted ready for the train to reverse direction and head back from where it came.
The pictures show the boards, and a short train made up of five four wheel wagons, a BWH and an MHG. This represents about 600mm in length, which will be a fairly typical length train I think. This should allow me to fit in a main line, a loop line and a couple of sidings. Basically operation will revolve around a mixed train coming in, wagons being spotted into various sidings, a new train made up and sent back around the room.
It's actually quite amazing how much enthusiasm you can get from having a base board, and placing a few random bits of track and rolling stock on it. Add a cardboard cylinder and suddenly you have a silo, and then the "imagineering" kicks in and you begin to see what will be there, not just some bits of pine and ply!
So if there is a point to this thread, it may well be try a little less planning, and get into it.


